Using a gas grill
How to use a gas grill
Santeri Viinamäki, CC BY-SA 4.0, via Wikimedia Commons
Let’s face it, using a Gas Grill can be…intimidating. For the longest time, it has been the gatekeeper to the world of the straight masculine man’s man.
After all, it’s basically one big gadget! It looks like there’s a lot that goes into it, so usually, we just let someone else handle things.
Honey, it’s time to set the record gay.
Grilling is for everybody, and nobody should feel intimidated by it! After all, it’s Pride Month! So, we’re here to show you how to use a gas grill in as little as three easy steps. THREE. ‘Aint nothing scary about that.
You’re going to need:
- A Gas Grill
- Small Fire Extinguisher
- A Backup Gas Tank
- Long Spatula
- Long Stainless Steel Tongs
- Paper Towels
- Choice of Oil (Grapeseed, Canola, Olive, etc.)
- Wire Brush
- Spray Bottle (optional)
So, grab your cutest booty shorts and a crop-top, and let’s get cookin’!
Step1: Open It Up!
This is really two steps. You’ll want to open the lid so there’s no gas buildup when it’s initially lit and to get acquainted with what you’re working with. Cast iron or stainless-steel grates, all that good stuff.
Then it’s to the gas tank. All you’ll have to do here is turn the knob on the top counterclockwise all the way to let the gas flow to the grill.
Whether your grill uses natural gas or propane doesn’t make much of a difference in this case.
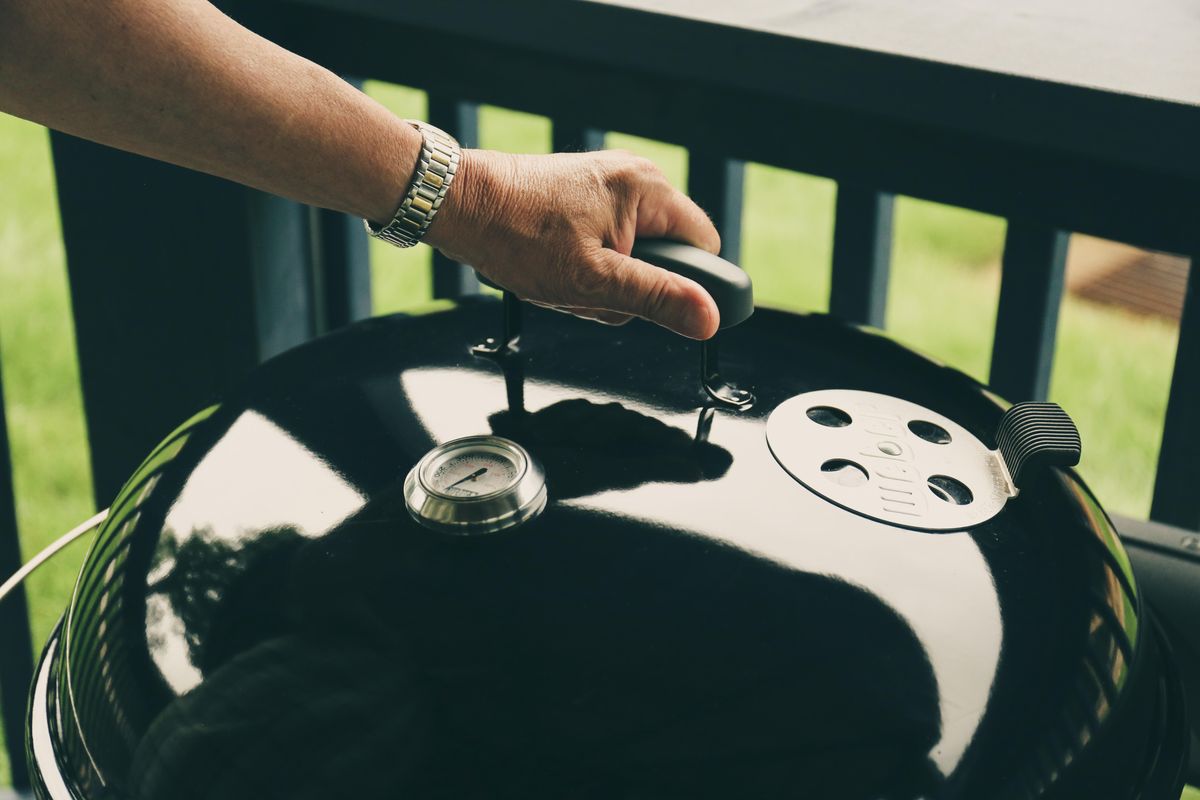
Step 2: Turn it on, and Heat it Up
How to heat a gas grill
Photo by Vincent Keiman on UnsplashThere’s a few knobs on the front of the grill. If you’ve got an ignite button, just give it a push and adjust the knobs to turn the heat up. Or, without the button, just press the knobs in like you’re lighting a gas stove top and adjust the same way.
You can either crank them all up or just one side if you want a little more control over what you’re cooking. The side with less heat is easier for you to move food back and forth, but it’s really up to you!
Now close the lid, and let it heat up to about 400 degrees.
Step 3: Clean and Season the Grates
How to grill food on a gas grill
Photo by Evan Wise on UnsplashYou’re going to want to make sure the grill is clean before and after using it. Which is usually easier to do when it’s already heated up. Get all that gunk off, ya know.
Use the wire brush to give the grates a scrub and get it ready to use.
Then, just like cooking anything else, you’ll need to oil it up so everything doesn’t stick. So, get a cup half full of the oil of your choosing, and use the tongs to dip a few pieces of paper towel in. Apply the oil to the grates. This way is easiest so you can just toss the towels after.
Now you're ready to start grillin'! Honestly…that's all there is to it!
Step 4. Shut Down the Grill
Once you have cooked your food, make to turn off all the knobs on the grill and make sure you shut off the propane tank too. Scrape off the grill with your wire brush, dispose of any trash and shut the lid.
Pro Tips
- Having your grill set up half super-hot and half less is the best way to make sure nothing is overcooked. Most gas grills have a small rack above the grates themselves that you can also use to move your items around. But in the other case, the half and half method is best.
- A backup gas tank will make sure you don’t run out mid-grilling too. ‘Aint no gas gonna slow your roll.
- A spray bottle filled with oil is a good way to re-coat the grill and give a light spritz to the food.
- Don't put on the grill cover until the barbeque has completely cooled down otherwise you run the risk of burning the cover or melting it.
Now get out there and grill like a Queen!
Charcoal grilled hamburgers are the best.
The weather is warming up, and that means it’s grilling time. It's time to invite friends over and fire up the grill. If you are new to grilling, it's best to start with the basics, and a charcoal grill is a perfect place to start.
What You’ll Need
Before you get started, it's important to learn about the type of charcoal grill you have. Ensure everything is in working order and familiarize yourself with the air vents on the grill because these help you control the heat. If you are looking to buy one, you will need to consider which size is best for your needs. We recommend buying one with an ash container for easy cleanup. Charcoal grills come in different shapes and sizes, and the price range starts at around $100 and can go up from there.
Once you have your grill set up, you will need a couple of things.
- Charcoal
- Chimney starter (optional)
- Grilling tongs
- Pumice stone for cleaning the grill grate
- Heat resistant gloves
Choose Your Charcoal
Charcoal briquettes are the classic choice
Photo by Amin Hasani on UnsplashCharcoal grills, of course, use charcoal as fuel, and there are two types of charcoal you can use. Charcoal briquettes are the most affordable option. You can find them in any supermarket in a big bag. They create consistent heat and burn for an extended time. While they are inexpensive, they don't add much smoky flavor and the slow burn creates a lot of ash.
Hardwood charcoal is the more expensive option, but worth it if you love the smoky taste of grilled food. This type of charcoal burns quickly and leaves little ash for easy clean-up. If you want the best of both worlds, you can use both charcoals together.
Before you get started, you will want to make sure you have enough charcoal. The amount of charcoal needed depends on how much you are planning to cook and for how long. A rough estimate is if you are cooking hamburgers, hot dogs, and chicken for a group, 4.5 to 5 pounds of charcoal is best. If you are cooking for 2-3 people, then 2.5 pounds of charcoal should be enough. And, if you are grilling a long-cooking cut of meat or using your grill as a smoker with lower heat but for an extended time then 2 pounds of charcoal is fine.
Light the Grill
Waiting for the grill to heat up is hard when you are hungry.
Photo by Erwan Hesry on UnsplashThere are a few ways to get your grill fired up. The most traditional way is to arrange the charcoal in a small pile on the grill and spray some lighter fluid on the charcoal. Always read the instructions on the bottle for the exact amount of fluid to use. Using too much lighter fluid can affect the flavor of your food. Give the charcoal a minute to absorb the fluid, then light the charcoal with a utility lighter. Once the charcoal is lit, resist the temptation to add more lighter fluid, it's dangerous, and it will be difficult to control the flame.
If you prefer not to use lighter fluid, you can use a chimney starter. Chimney starters are available at any hardware store, and if you grill frequently, they are a great investment. Using a chimney starter is the fastest way to get your charcoal piping hot. Some starters have a place to add either newspaper or fire starter cubes. Follow the instructions, add the charcoal to the starter, and light from there. Once hot, pour onto the grill. Use heat-resistant gloves for safety.
For tech lovers, there is also an electric charcoal starter. Just place the charcoal on the grill and touch the electric starter to the charcoal until it lights.
Another option to light the charcoal is a strike-able fire starter. They are like a large match that you can place in the middle of the charcoal to get the coals going.
However, you get your charcoal started, you will need to wait for your grill to heat up before you start cooking. It can take around 15- 20 minutes to get hot enough to cook your food. Most charcoal grills have a built-in thermometer to help you know when it reaches grilling temperature which is anywhere between 350 to 450 F. While your grill is heating up, you can prepare the grill grate.
Prepare the Grill Grate
Oil up the grill grate to keep juices meats from sticking.
Photo by Andrik Langfield on UnsplashYou should always start with a clean grill. While you don't need to deep clean the entire grill after each use, you should clean the grill grate before and after each use. Use a pumice stone made for grills to clean your grill grates. There are wire brushes on the market for this, too, but there have been cases of metal bristles breaking off and getting stuck on the grill and then sticking to food, so stick with a pumice cleaner.
Once the grate is clean, brush some oil on the grate to keep food from sticking. Save your olive oil for your salad. Instead, use a high heat oil like vegetable or canola.
Arrange Coals for Effective Cooking
Sear some steaks for the perfect grill marks.
Photo by Paul Hermann on UnsplashOnce the charcoal has heated up, you can use your grilling tongs to arrange the coals. Charcoal placement is key to coking with charcoal. As a general rule, you will want to have two cooking areas on your grill—one for direct heat to sear and one for indirect heat for foods that require longer cooking time. Searing is good for steaks, while indirect heat is better for meat on the bone and roasts.
Another option is to use grilling planks on the charcoal grill. Grilling planks are pieces of wood like cedar or alder that you can cook food on rather than placing the food straight on the grill. Soaking the planks in water for an hour prior to grilling ensures they won't burn. Then, place meats, fish, or vegetables on the plank for a smoky dish.
Cleaning Up the Grill After Use
Properly caring for a charcoal grill extends its life.
Photo by Taylor Grote on UnsplashWhen your last burger has been flipped, and it's time to turn off the grill, just close the vents and put the lid on the grill. Without air to fuel the fire, it will gradually burn out. This can take up to 48 hours for it to completely cool and be safe enough to remove the coal and ashes.
If you are in a hurry you can use your tongs and pull out each charcoal brisket and place it in a metal bucket filled with water. Scoop the hot ash into a metal container to let it cool. Never pour water onto a charcoal grill as it can damage the grill and leave a sludge that you will have to clean later. Plus, water directly on hot coals creates dangerous steam that can burn anyone near the grill.
When your charcoal grill is cooled and cleaned, it's ready to be stored for next time. While charcoal grills are sturdy and can be left outside, if you live in a colder climate you will want to ensure it is protected from the elements to extend the life of the grill.
Tips and Tricks for Charcoal Grills
- Resist the temptation to flip your food too much
- Control the heat by using the vents and lid
- Keep the heat around 350° F for most foods or 450° F for searing
- Add a handful of wood chips like hickory or mesquite to the coals for more flavor
Get Creative with Grilled Food
Did you know you can grill more foods than just your standard hamburgers, hot dogs, and steaks? Try your hand at grilling different foods like:
- Pineapple rings
- Zucchini slices
- Pizza
- Eggplant slices
- Cabbage steaks
It’s that time of year again when I long for outdoor space so I can drag out my charcoal grill and cook up some meat. It’s BBQ season!
Barbecue is one of my favorite foods and one of my favorite techniques for cooking. The best part of grilling is that you get to work with smoke and fire plus you can experiment with so many techniques and flavors.
Barbecue is known worldwide and has been around for thousands of years. In the United States, it has taken on a life of its own. Each region has its own version of BBQ. When barbecuing, it is typical to use some type of wood like apple, cherry, hickory, or mesquite — just to name a few. My favorite to use is apple or cherry because it’s not as harsh as hickory or mesquite.
AWESOME SAUCES
To prep the meat, some use dry rubs, wet rubs, brines, or just use salt and pepper. Any type of barbecue has the low and slow technique in common. And don’t forget the sauce. Choose from a vinegar-based sauce, tomato-based sauce, ketchup-based sauce (just about the same as tomato-based but different). There is even a mustard-based sauce and a mayonnaise-based sauce.
These sauces go on any type of meat such as goat, beef, pork, and chicken. And I’m not even including sausages! Every region will have its favorite sauces that go with a particular cut of meat. Some say vinegar sauces only go with pork, and mayonnaise sauces go best with chicken and pork chops.
Believe it or not, Sweet Baby Ray’s Barbecue Sauce has dominated the BBQ sauce industry for years. It’s a Kansas City-style sauce and is our go-to. If you are looking for something to go over that grilled chicken (or fried chicken for that matter) try an Alabama White Sauce. Try the Carolina Gold Sauce on some pork ribs or pork chops. If you are going the pulled pork route, you definitely want to give the North Carolina Vinegar BBQ sauce a shot. It cuts through the richness of the pork. All these sauces are so easy to make and literally take minutes. The ingredients are probably already in your pantry.
I could go on and on about BBQ sauce and the meat. You need to try them all and keep them in your arsenal. They are delicious and you can’t go wrong with whatever you decide to put on your BBQ.
One of my favorite things to grill is Carne Asada using flank steak or a skirt steak. You marinate it for a few hours, throw it on the grill and cook it to a perfect medium rare with a nice little char on the outside of it. I’ve put together an easy recipe for you to try.
The flank steak is going to be accompanied by an Argentinian-style Chimichurri sauce made with herbs, spices, oil, and vinegar. Flank steak is a tougher piece of meat so it’s important to tenderize it with a marinade. This will help soften the meat when cooked. Chimichurri is great because you can use it as a marinade, as a basting ingredient, and also as a condiment. This recipe focuses on Chimichurri as a condiment.
Technically, this is a grilled dish, not barbecued. The difference is BBQ is usually low and slow using smoke or indirect heat. Grilling is using direct heat, or an open flame to cook the food and controlling the intensity of the heat.
This grilled flank steak with chimichurri sauce is packed full of flavor and spice and it never disappoints. Pair it with a great bold red wine or a nice full-bodied beer and you can’t go wrong. Now grab that grill and get it ready!
TRY THIS AT HOME
Rosemary Garlic Flank Steak with Chimichurri Sauce
Serves 4
Marinade
½ cup canola oil
4 garlic cloves, minced
2 teaspoons dried rosemary
2 limes, zest and juice
1 teaspoon salt
½ teaspoon pepper
Flank Steak
1 ½ pounds flank steak, trimmed
Chimichurri Sauce
¾ cup parsley, stems included
⅓ cup red wine vinegar
3 garlic cloves
1 teaspoon oregano
1 teaspoon crushed chili flakes
¼ cup extra virgin olive oil
salt and pepper to taste
Marinade instructions
- Mix together all ingredients in a bowl.
- Coat steak with marinade, cover, and place in leak-proof container for 1 -2 hours in the refrigerator.
Cooking instructions
- Remove steak from refrigerator 30 minutes before cooking and let sit at room temperature.
- Prep your grill while steak is coming to room temperature.
- Cook to medium-rare. Cooking time will vary depending on thickness of steak.
- Tent with aluminum foil and rest 10 minutes.
- Slice against the grain. Serve.
Chimichurri instructions
- Place all ingredients in a blender or food process except for the olive oil.
- Blend ingredients and slowly drizzle in oil until emulsified.
- Place sauce in a serving bowl.
- Add salt and pepper to taste.
- Drizzle sauce over sliced meat and serve.
Other Tips and Tricks
- If you can’t find flank steak, you can substitute London Broil or skirt steak.
- You can cook this on the stovetop using a cast-iron skillet or you can use the broil option of your oven.
- Optional: eating it with corn tortillas
- For vegan or plant-based options, use the same marinating process keeping in mind that you will need to baste as the vegetable cooks because it will not absorb the marinade.
- Use large portobello mushrooms in place of the steak. (My favorite option)
- Use cauliflower steaks in place of the steak.
You may also like
- This dish would go great with my Watermelon Margarita and Pineapple Pico de Gallo